

IIS attaches a set of headers like Content-Type and X-Powered-By to the response by default. In addition to these headers, developers can also add custom headers. If you want to change or remove one of these response headers, you can use URL Rewrite rules in IIS Manager.
Change Response Headers using URL Rewrite
Follow the steps below to change the value of a response header. Please note that these steps won’t remove a response header. They will only change the value.
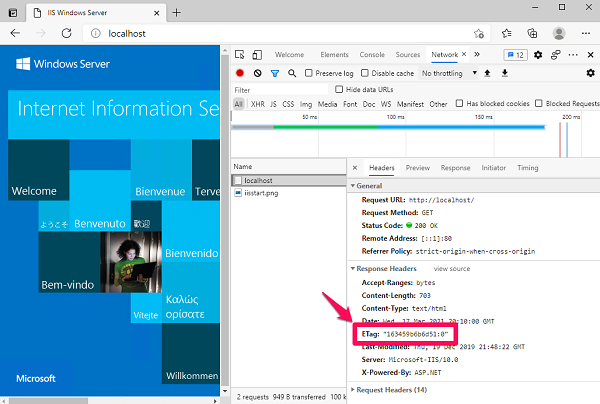
For this post, I changed the value of ETag header. It’s one of the default headers.

There are two high-level steps:
- Add a server variable
- Add a URL Rewrite rule to edit this server variable
Steps to add a server variable
- If you haven’t already, install URL Rewrite and reopen IIS Manager
- Click on the website
- Double click on URL Rewrite
- On the right side, click View Server Variables
- Click Add
- Enter RESPONSE_ETag and click OK


Steps to add a URL Rewrite rule
- In IIS Manager, click on the website
- Double click on URL Rewrite
- On the right side, click Add Rule(s)
- Select Blank rule in Outbound Rules section and click OK
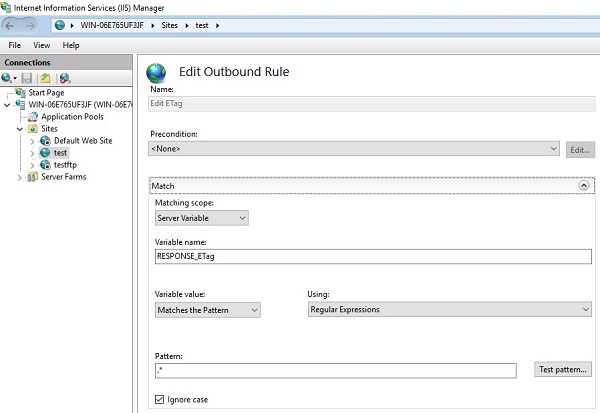
- Fill out the fields with the following values
- Precondition: None
- Matching scope: Server Variable
- Variable name: RESPONSE_ETag
- Variable value: Matches the Pattern
- Using: Regular Expressions
- Pattern: .*
- Ignore case: checked
- Conditions: none
- Action type: Rewrite
- Value: newvalue
- Replace existing server variable value: checked
- On the right side, click Apply
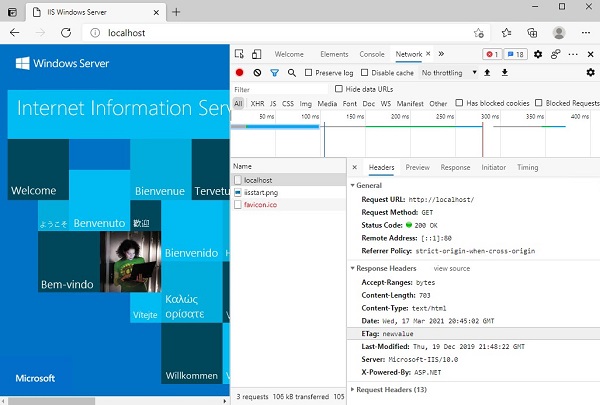
- Clear the cache and refresh the page (or hit Ctrl + F5). ETag header should have “newvalue” now
Here is how the Match section of the rule looks like:

Action section:

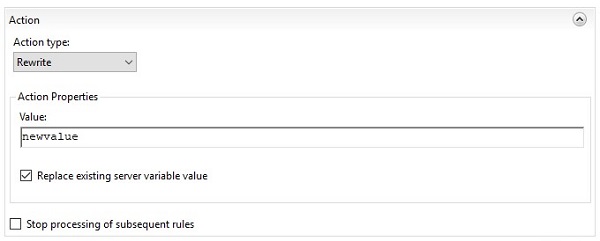
New value:

If you want to change a header to prevent Host Header Attack, check this post out: Solution for Host Header Attack and Vulnerability. Other useful links: Post 1, Post 2