IIS hosts millions of websites around the world. Thanks to IIS Manager, it is easy to create and manage websites. Websites use default functional and performance settings which are efficient most of the time. However, you may want to fine-tune IIS performance for specific applications and cases.
Fine-tuning IIS Performance
In this post, I will explain 8 recommendations that potentially improves IIS performance. Most of the recommendations are compatible with IIS 7.0 and newer versions with a few exceptions. I will mention the exceptions in their respective section.
Recommendation areas:
- Output Caching
- Application Initialization
- Default Document
- HTTP keep-alive
- Cache-control Header
- Idle Time-out Action
- Dynamic Compression
- and 9. Other options (Queue Length, Enable 32-bit Applications)
1. Output Caching
Applies to IIS 7+
IIS has kernel-mode and user-mode components. Kernel-mode components receive and route HTTP requests, manage connections, and send responses back to clients. User-mode components process the requests and prepares responses. There is a response cache for both kernel-mode and user-mode levels.
Using cache allows IIS to handle requests faster. However, the consumption of the physical memory increases as the cached entries occupy space in the memory. It is recommended to monitor the memory usage and limit the maximum amount memory that can be used by cache.
Kernel-mode cache
HTTP.sys is a part of kernel-mode and it includes a response cache (kernel-mode cache). Requests can be satisfied entirely by using this cache. Enabling kernel-mode cache speeds up page load time, reduces bandwidth usage and the amount of data transfer, and decreases the server load which significantly lowers the CPU cost of handling the requests.
Some features such as authentication and authorization cannot be served by using Output Caching. Therefore, IIS only allows the static content such as HTML, JavaScript, CSS, and images to be cached at kernel-mode level.
User-mode cache
Dynamic content such as ASP and PHP pages can be cached in the user-mode level. In user-mode level, requests are handled in containers (worker processes) which provides more security and manageability.
Enable Output Caching
Follow the steps below to enable Output Caching. These steps will enable both kernel-mode and user-mode caching.
- Go to IIS Manager
- Click the server name
- Double click “Output Caching”
- Click “Edit Feature Settings” in the “Actions” menu on the right side
- Check both “Enable cache” and “Enable kernel cache” options
- Click a website that you want to enable Output Caching for
- Double click “Output Caching”
- Click “Edit Feature Settings” in the “Actions” menu on the right side
- Check both “Enable cache” and “Enable kernel cache” options
- Restart HTTP service. Run the commands below in the given order on Command Prompt:
iisreset /stop
net stop http
net start http
iisreset /start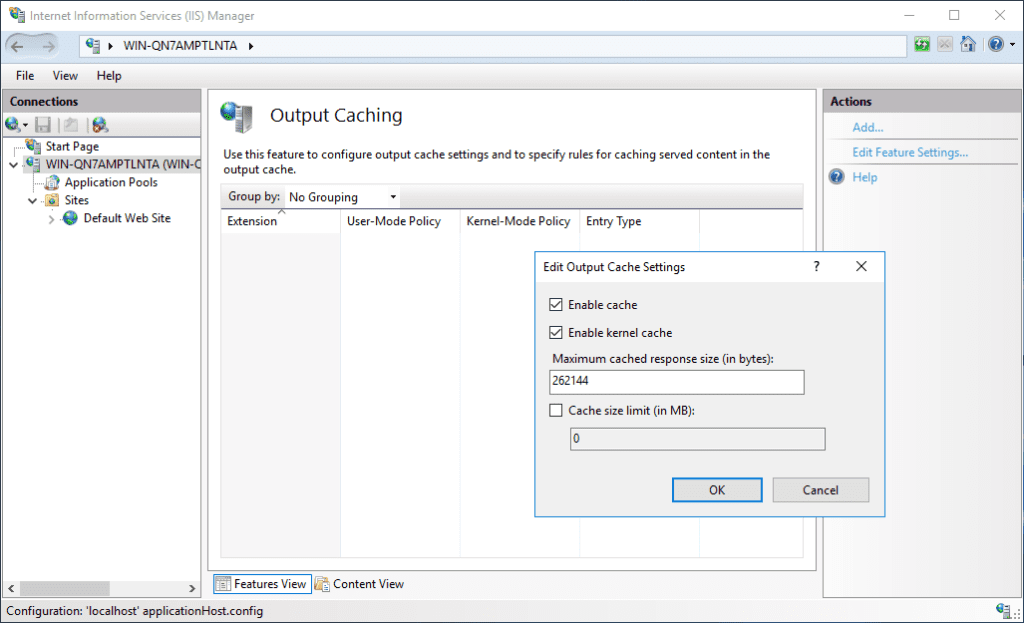
2. Application Initialization
Applies to IIS 7.5+
This is a feature in IIS that manages what happens when an application is started for the first time. The startup process affects the speed of the website for the users who hit the website for the first time after a deployment, server restart, IIS reset, application pool restart or application pool idle time. For large applications, the startup time could be high because the website compiles the code, initiates caching, loads components, and generate files.
Enable Application Initialization
Follow the steps below to enable Application Initialization.
Note: The steps below apply to IIS 7.5+. IIS 7.5 requires Application Initialization Module to be installed. This module is built-in for IIS 8+ but it should be checked during IIS installation:

Steps:
- Go to IIS Manager
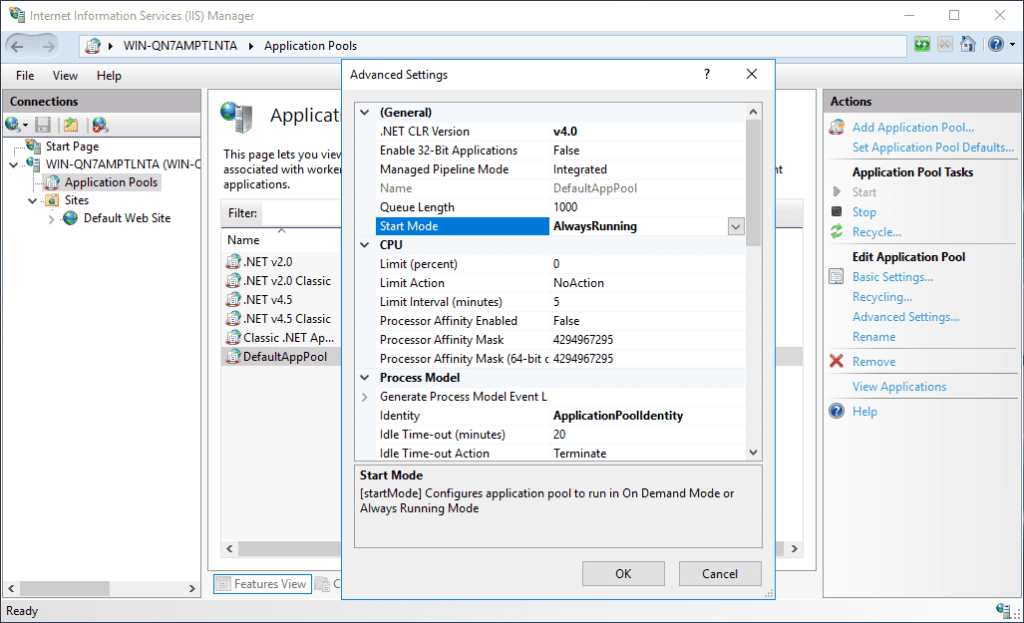
- Click “Application Pools”
- Select the application pool that is used by the website you want to enable Application Initialization for
- Click “Advanced Settings” in the “Actions” pane
- Select “AlwaysRunning” from the “Start Mode” list (For IIS 8 and lower versions, select “True” for “Start Automatically” option in addition to the “Start Mode” selection)
Continue with the steps below:
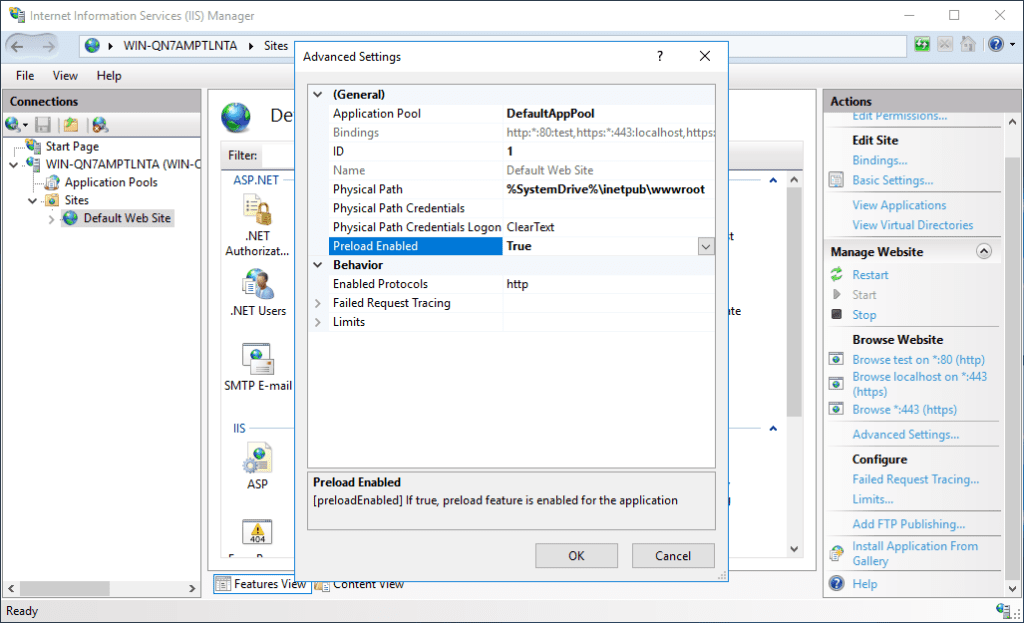
- In the “Connections” pane, select the website or the application
- Click “Advanced Settings” in the “Actions” pane
- Select “True” from the “Preload Enabled” list
- Restart IIS (
iisresetin Command Prompt)
3. Default Document
Applies to IIS 7+
IIS uses modules to process requests in the integrated pipeline. One of these modules is the Default Document Module. It handles the requests that go to the root of a directory for an application. Since these requests don’t specify a file name, the Default Document Module searches the list of allowed default documents. This can negatively affect the IIS performance.
By reducing and reordering the list of default documents, the application response time can be increased. While editing the list, make sure to have only the default documents that are used by that particular application. Additionally, make sure that the list begins with the most frequently accessed default document name.
Edit Default Document List
Follow the steps below to edit the Default Document list.
- Go to IIS Manager
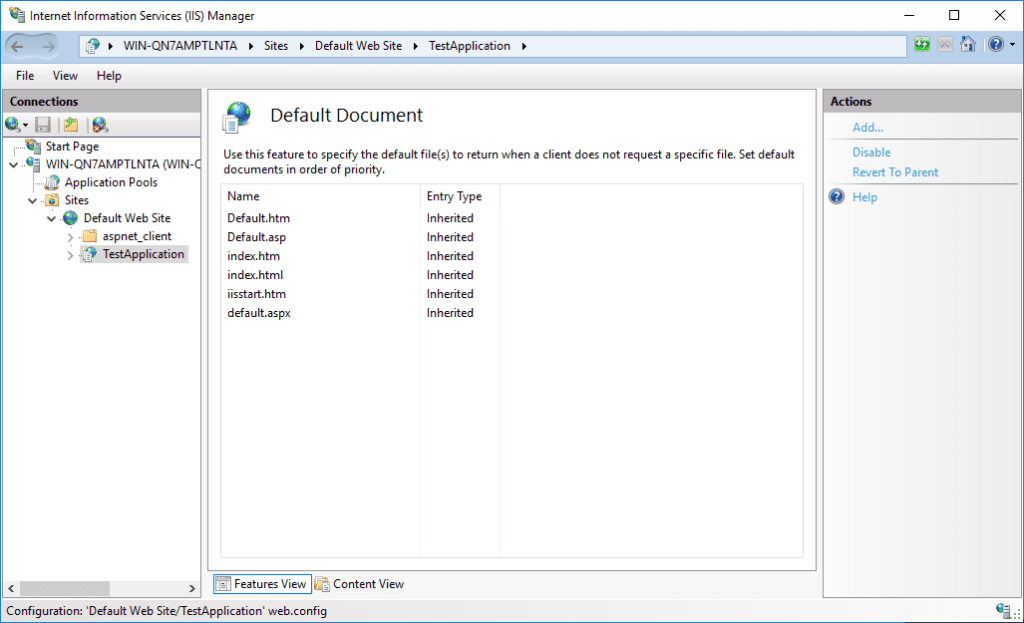
- Click the website or application which you want to edit the Default Document list for
- Double click “Default Document”
- Edit the list (Remove the file names that are not used. Move the most used file name to the top)
4. HTTP keep-alive
Applies to IIS 7+
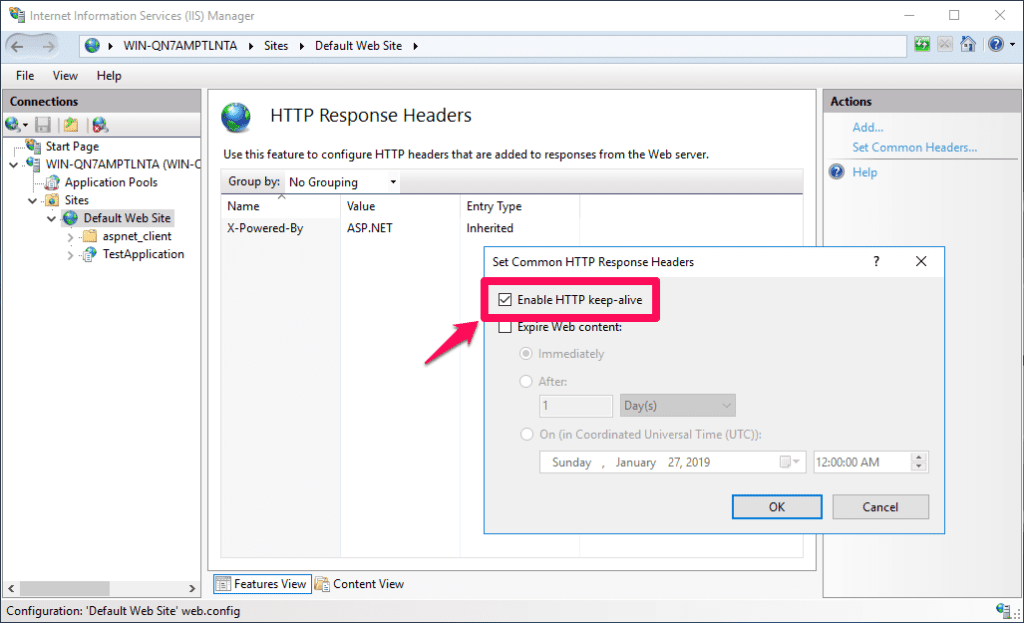
When a client visits a webpage, the browser makes multiple requests to download the entire page. In order to load the page, the browser may initiate separate connections for each element such as images. By enabling “HTTP keep-alive” option, the server keeps the connection open for these multiple requests which increases the server performance and response time.
Enable HTTP keep-alive
Follow the steps below to enable the HTTP keep-alive option for a website or application:
- Go to IIS Manager
- Click the website or the application which you want to enable “HTTP keep-alive” for
- Double click “HTTP Response Headers”
- Click “Set Common Header” in the “Actions” pane
- Select “Enable HTTP keep-alive” option
- Click “OK”
If your application is causing high CPU load due the incorrect usage of HttpClient object, check this post out: High CPU load in IIS web server caused by HttpClient
5. Cache-control Header
Applies to IIS 7+
When a client visits a webpage for the first time, the request is processed by the web server and a response is sent through network. If no caching is set up, the same steps are executed which could be time-consuming if the response hasn’t changed (there is no update for the website). If caching is set up, the client will use its own cache to visit the website which significantly improves the response time. It also improves the server performance as the request is not served by the server.
The cache-control is an HTTP header. In addition to the client machines, this header is also used CDNs, load balancers, and proxies. This header has a setting that states how long the assets should stay in the cache for.
Enable Cache-control Header
Follow the steps below to enable cache-control header for a website or application:
- Go to IIS Manager
- Click the website or the application which you want to enable cache-control header for
- Click “Set Common Header” in the “Actions” pane
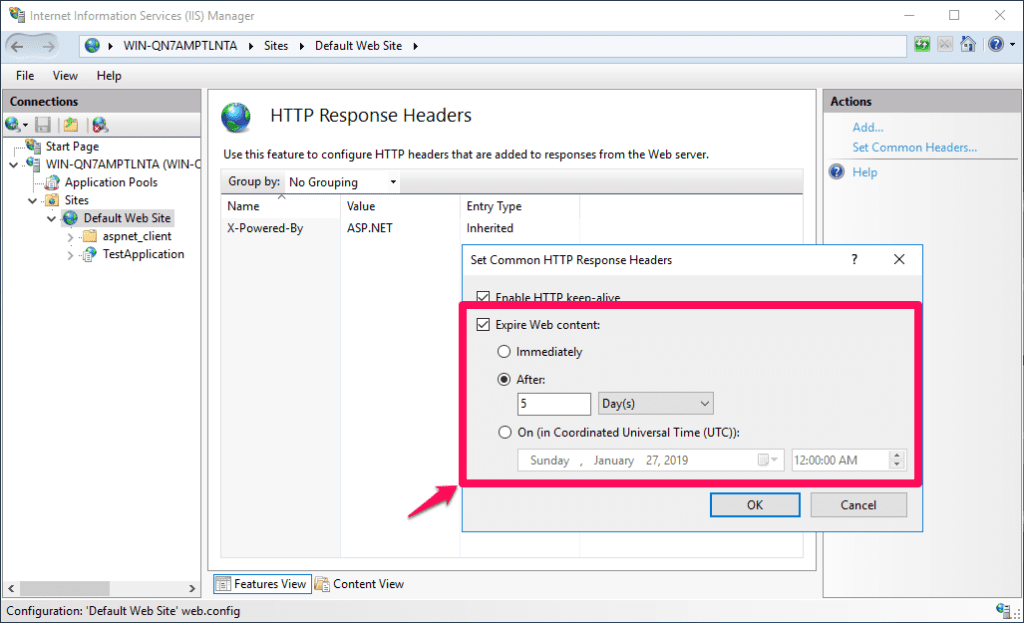
- Select “Expire Web content” option
- Select “After”. Enter a value. The value you enter entirely depends on how often you update your content. For example, if you update it weekly, make sure that the value doesn’t exceed 7 days.
- Click “OK”
6. Idle Time-out Action
Applies to IIS 8.5+
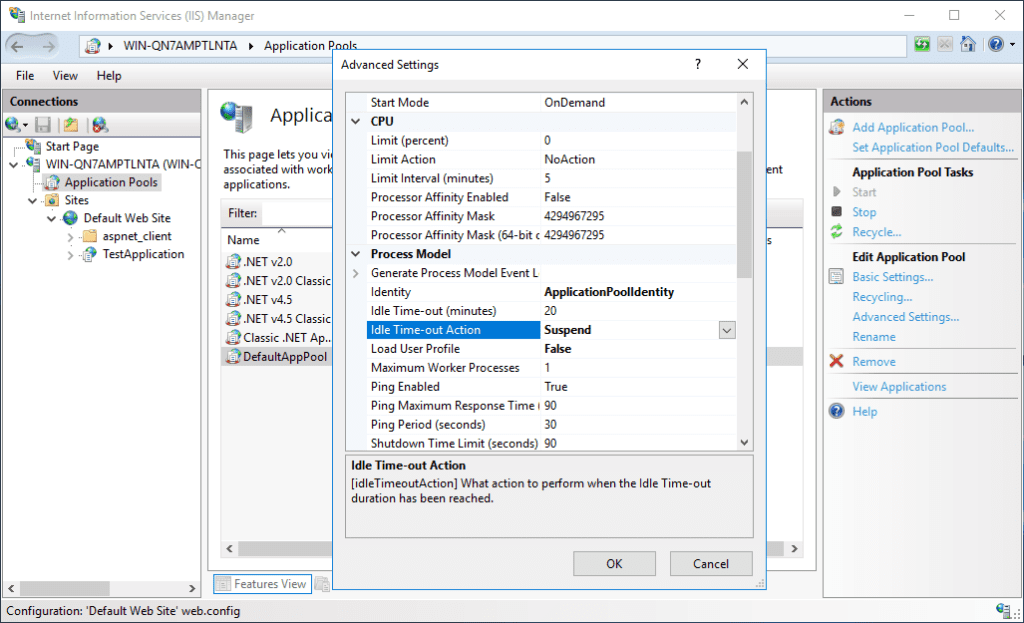
A request in IIS is handled by a worker process (w3wp.exe). Each application pool has one or more worker processes. By default, if a worker process is idle (no requests received) for 20 minutes, it is terminated (Idle Time-out Action). When a new request comes in after a worker process is terminated, the user experiences the spin-up cycle which consumes resources.
By setting the Idle Time-out Action to “Suspend”, you can prevent worker processes to be terminated after the idle time-out threshold is reached. Theoretically, it improves the web server performance because a worker process won’t need to go to startup process which means the user will access the site almost instantly. In practice, “Suspend” option may not be ideal for your application if it has a high-traffic or it is using a large amount of memory:
- High-traffic applications will have visitors constantly so the worker process will stay active. The sites that take advantage of the “Suspend” option are the ones that have 20 visitors or less per day. In order to make decision about this option, please check your traffic patterns. If visits have time lapses more than the time-out value (20 minutes by default), then enabling the “Suspend” option is a good idea. Please have a look at this article for an example.
- The applications that use a large amount of memory are not good candidates for “Suspend” option because the computer writes the data used by worker process to disk. Since the size of the data is big, the cost of suspend is higher than termination.
Set Idle Time-out Action to “Suspend”
Follow the steps below to set the Idle Time-out Action to “Suspend”:
- Go to IIS Manager
- Click “Application Pools”
- Select the application pool that is used by the website you want to change Idle Time-out Action for
- Click “Advanced Settings” in the “Actions” pane
- Select “Suspend” from the “Idle Time-out Action” list
7. Dynamic Compression
Applies to IIS 7+
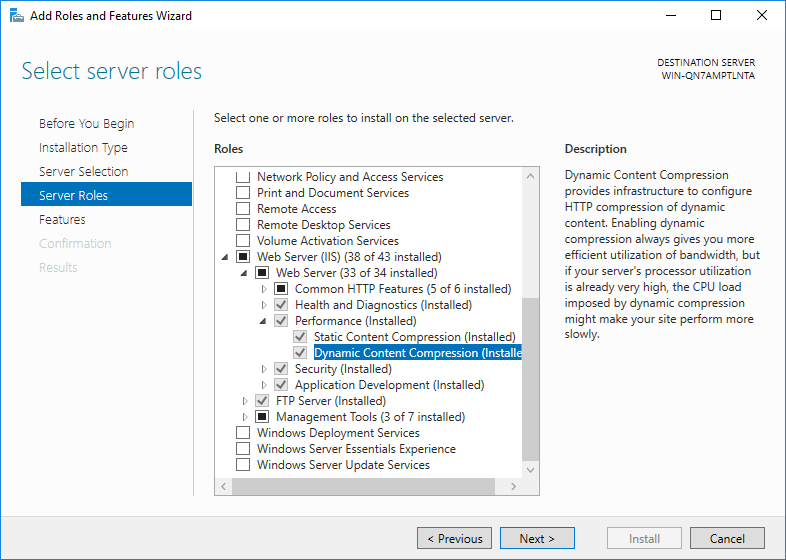
IIS compresses the static content (images, CSS files, HTML files etc.) by default to reduce the bandwidth used for requests. By enabling the compression for dynamic content such as ASP.NET pages, you can save bandwidth for dynamic content as well. It results in decreasing the response time and improving the web server performance. However, enabling the dynamic compression adds extra load to CPU (about 5% CPU overhead).
Enable Dynamic Compression
This feature should be installed first before using it. In the Server Manager, make sure “Dynamic Content Compression” is installed. For Windows Server 2008 and Windows Server 2008 R2, see the instruction in this link.
Once making sure that Dynamic Compression is installed, follow the steps below to enable it:
- Go to IIS Manager
- Click the site or application you want to enable Dynamic Compression for
- Double click “Compression”
- Select “Enable dynamic content compression”
- Click “Apply”

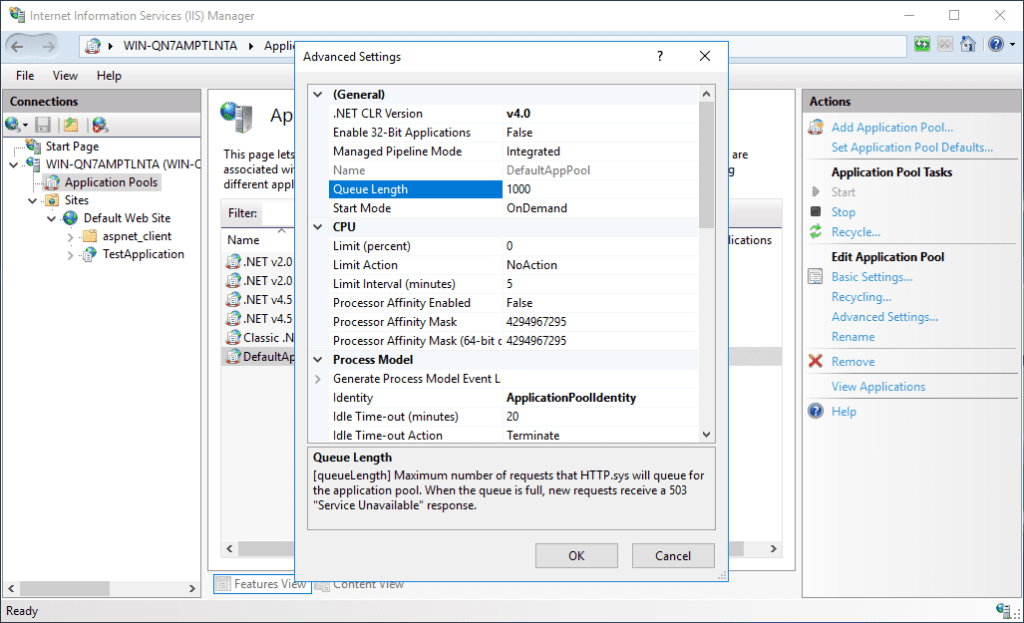
8. Other options (Queue Length, Enable 32-bit Applications)
Queue Length
Application pools have a setting called “Queue Length”. The value of this setting specifies how many requests can be queued by HTTP.sys which is a kernel-mode component that manages and reroutes requests.
The default Queue Length is 1000 which is enough for majority of web servers. If the web server needs to queue more than 1000 requests, IIS starts rejecting requests and logs 503 Service Unavailable error. There is no recommendation and formula to calculate the optimum value. It is recommended to monitor queue size and increase this value only if the size approaches to 1000 (default value).
Enable 32-bit Applications
If the memory usage is a concern in the web server, consider enabling this option in the application pool settings. Since 32-bit applications use less memory than 64-bit applications, enabling this option decreases the memory usage.
BONUS CONTENT! Using CCS (Centralized Certificate Store) can speed up certificate management for your IIS servers. Check this post out: What is Centralized Certificate Store (CCS) and how to use it?
References
- Tuning IIS 10.0 (Microsoft Docs)
- Configure the IIS Application Initialization module (MSDN Blogs)
- HTTP Protocol Settings (Microsoft Docs)
- Configuring Application Pool Settings (Microsoft Docs)
- URL Compression (Microsoft Docs)
1 thought on “9 Easy and Practical Recommendations to Improve IIS Performance”
Comments are closed.