While analyzing IIS logs, system admins may come across a specific IP address that is generating an unusual amount of traffic. If you think this is s malicious activity, you can easily block the IP address using a built-in IIS feature.
Block an IP address in IIS Manager
Here are the high-level steps for using IP and Domain Restrictions module to block an IP address.
- Install “IP and Domain Restrictions” using Server Manager
- Close and reopen IIS Manager
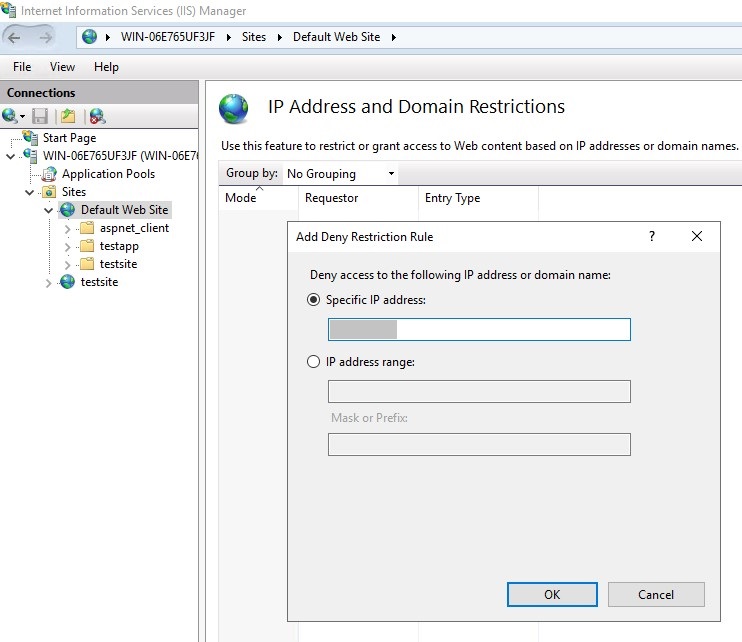
- Click on the website. Go to “IP Address and Domain Restrictions”
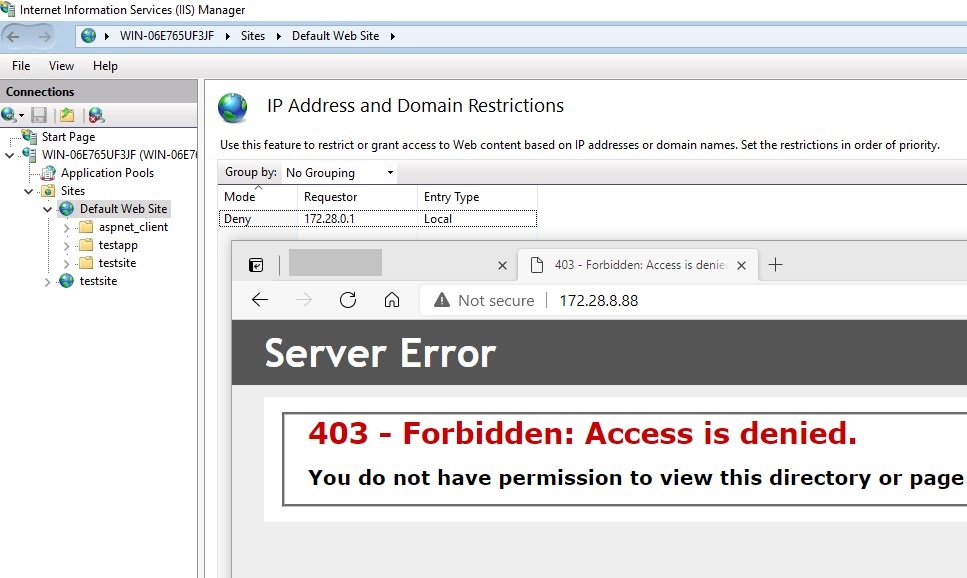
- Add a Deny rule with the IP address
- Once you add the rule, the client with that IP address will see 403 Forbidden error
The user whose IP address is blocked will see “403 – Forbidden: Access is denied. You do not have permission to view this directory or page using the credentials that you supplied” message. If you want to change this message, check out this tutorial.
For other IP address related management activities in IIS, please check the related posts below.