3D printing was something only manufacturers were able to afford years ago. Now, it’s entering our houses with a low cost and easy-to-use 3D printers. Here is a jump-start guide to 3D printing for beginners.
If you are new to this area and have a limited budget (just like me), I would recommend buying a user-friendly 3D printer that comes with all the equipment you need including a filament (like the ink for normal printers).
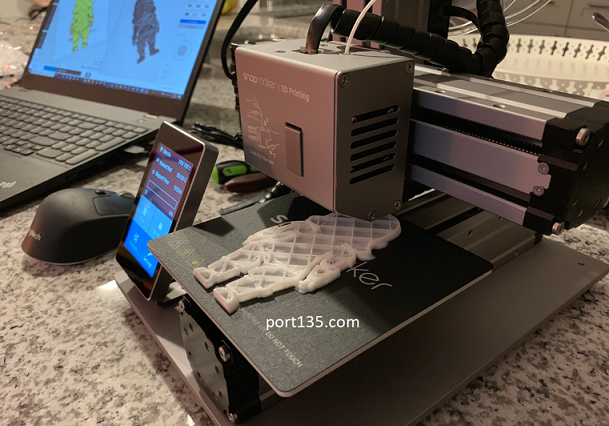
There are several good alternatives on Amazon. The price for 3D printers goes from $150 to a few thousand dollars. I chose a relatively new product, Snapmaker. It has $799 price tag on Amazon.
One big advantage of Snapmaker 3D printer is that its capability of laser engraving and CNC carving. Only other 3-in-1 alternative was Dobot Mooz. Both are results of successful Kickstarter campaigns.
Need a tool to design infographics and charts? Check this post out.
A quick guide to 3D printing for beginner
It took only about an hour from me to assembly my 3D printer and start the first printing job. Here is a 2-minute video for my first 3D printing experience!
Here are the high level steps to 3D printing for beginners:
- Assembly the printer. It is as easy as assembling IKEA furniture. Follow the instructions of the manufacturer. I would say, Snapmaker did a good job on instructions document. It was easy to follow.
- Do the calibration. The printer should know the exact position of the heated bed (the plate on which the 3D model is printed). Follow the instructions carefully as even millimeters make a difference for the final result.
- Load filament. Snapmaker comes with a white filament (PLA type). This is all you need to get started! Again, instructions are pretty clear about how to load the filament.
- Download the software. You will need Snapmaker3D software to send models to your printer. It’s fast and easy to download via their website. The printer is also compatible with Cura, Simplify 3D, and Slic3r (I haven’t tested any of these).
- Open the 3D file in the software. You will need 3D models in STL files. You can download free samples on Thingiverse. This a good source about 3D printing for beginners.
- Connect and print! Once you open your STL file successfully in Snapmaker3D, connect your laptop to the printer via USB cable and click “Connect” button. Then click “Preview”. If everything looks good, click “Print” and enjoy!
It may take several hours to print out a 3D model. The wait time depends on the size of the model and the quality you choose. I printed this Storm Trooper model in %90 scale and “Fast Printing” option. It took about 10 hours to finish.
If you have recommendations about 3D printing for beginners, please drop a comment!
If you are interested in devices such as 3D printers, you will probably like Amazon’s voice assistant, Alexa, too! Check this post out to see what Alexa can do for you.